Tutorial- Adobe Photoshop CS- Windows | ||
A Thistle | ||
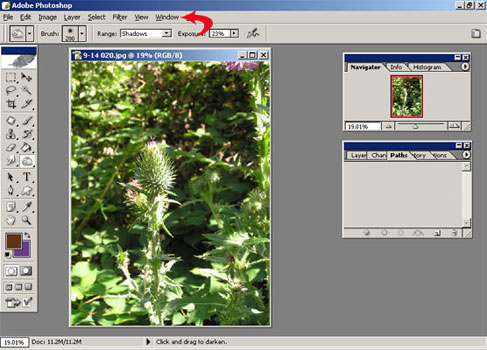
| Open your image. If you haven't already done so, you can adjust the resolution (I use 300 dpi for print images) and save as a psd format now. If you are only going to be using the final image as a web graphic, you can leave it at 72 dpi jpg.
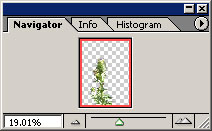
Make sure you have your layers palette open. You'll find your palette options under the Window tab. I am showing the Navigator and the Layers palettes open. | |
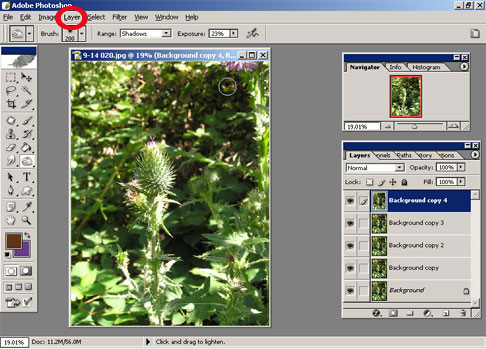
| Give yourself a few duplicate copies to work with. Go to Layer- choose duplicate layer and click on it a few times. Or you can right click on the layer and chose duplicate. I'm sure there is a keyboard shortcut for this also, but it would likely be different for PCs and MACs- plus some people create there own keyboard shortcuts. Being a lousy typist-I don't use keyboard shortcuts. | |
You click on the little eyballs to make a layer visible or invisible. | 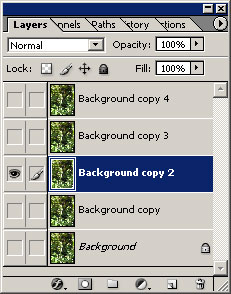 | |
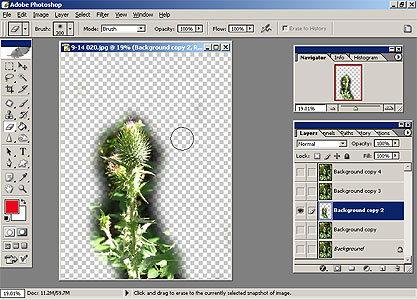
This is where you find the eraser tool. | 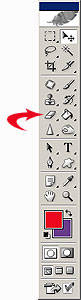 | |
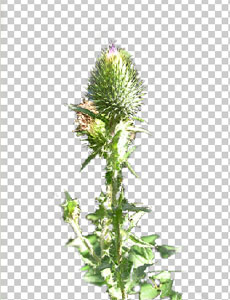
| I am using the large (300) soft edge eraser brush to remove most of the image. No need to be exact at this point. You will notice the checkerboard background. That indicates that this is a transparent section of the image. | |
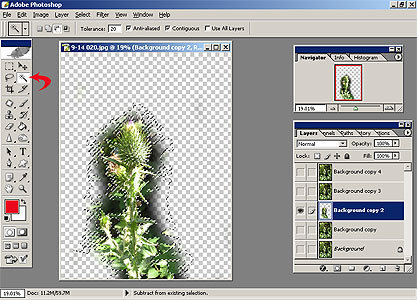
| You can use the magic wand tool for getting closer to the edges. I have the tolerance set a 20 for this- You just have to play with the tolerance and see what level is right for the image you are working on. You will get little sparkly dots edging the area selected. When you have as much as you want selected- just hit Clear; under the Edit tab. Then hit deselect under the Select tab to see how you're doing. You can also use the little lasso looking tool. Second icon down on the left- It will let you choose bigger sections to grab. Gives you more control, but it is more tedius to use. | |
| This is where I find the navigator handy. You can use the little slider bar to zoom in and move around to different parts of the image. Handy for doing more detailed work. You can use keyboard shortcuts or the zoom feature (little manifying glass in the tool bar)- but I personally like the navigator. | |
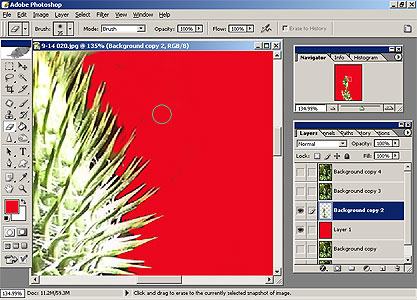
| For doing these "artsy" pics I'm not too concerned with getting a perfectly isolated image. It will be more interesting later on if it is a bit rough at this stage. If you want to check and see if there are more bits to clean up you might want to look at it against a high contrast background. Just go to Layers- make a NEW layer _underneath_ the working layer- and fill it with a solid color that will contrast with your image. There is a Fill tool in your toolbar (the image of a paint bucket pouring) that makes this a snap. If you don't see a paint bucket image, it may be set on gradient fill. It is the icon below the paintbrushes. You can switch it back and forth between paint bucket and gradient fill by holding the mouse down on it. Now you can go in and take out any areas you missed on your first go round. ;) Be sure to check the edges of the page. | |
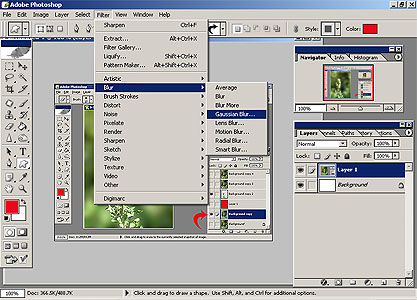
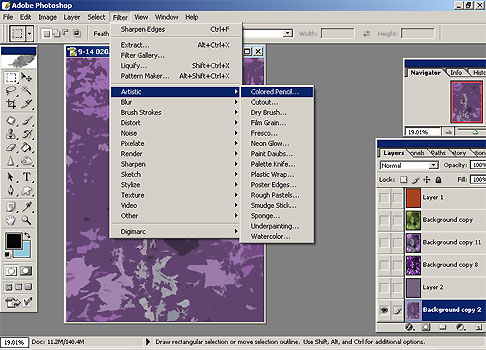
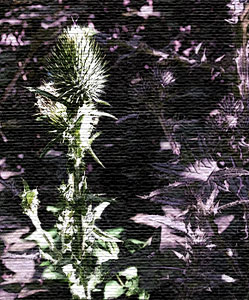
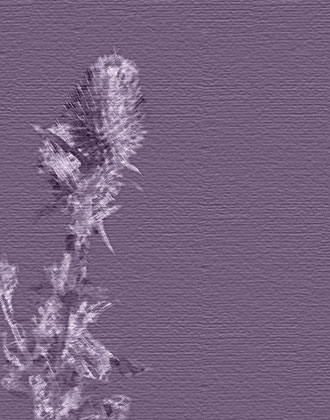
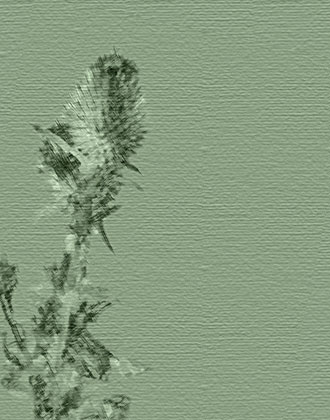
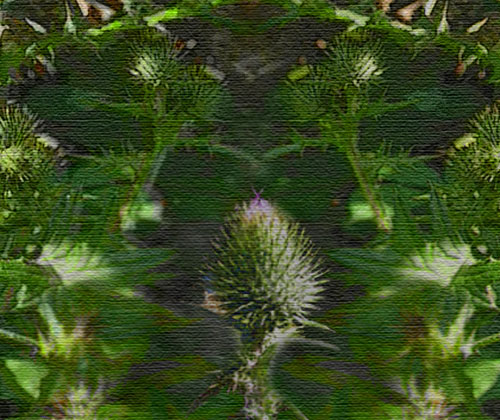
| So- what do we do now? The original background of this picture was too busy to be very useful. But it might work if we blur it - the guassian blur filter is a handy function. Unclick the eyeball on the contrast layer and click one of the original image layers under your working layer. Highlight it and hit the gaussian blur filter. It will let you decide how much you want to blur it. This looks promising. I usually duplicate the working frame a few times now and then combine one with the blurred frame and maybe combine one with a solid color back. Now it's time to have some fun. Time to start playing with the art filters. | |
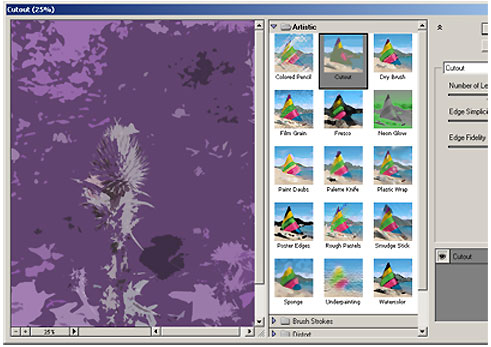
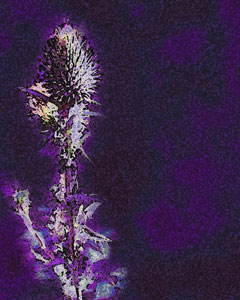
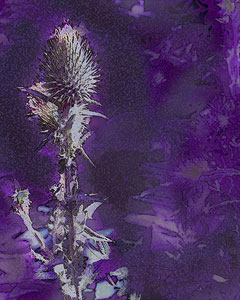
| Go to the Filters tab and click on Artistic. You will get a lot of options to play with. Just try them out and see what looks cool. Each filter gives a very different look. Some are just bizarre- but some of them will look pretty spiffy. You can use your layers palette to combine them in different modes. It can totally change the look. The textures filters can also add some interesting effects. I like to add a canvas texture to these- gives it that illusion of traditional artwork. I also go to the Image tab and play with the Adjustments. You can change the Hue/Saturation, adjust the contrast- lots of different options. Take a look and see what they adjustment options can give you. | |
|
| ||
|
| ||
|
| ||